Hey everyone, today we are going to walk you through what to do if you recently removed, baked, and cleaned the DPF on your John Deere. If you have replaced the DPF and need it coded into the system, you will follow a very similar process.
Related Product
John Deere Service Advisor EDL V2 Electronic Data Link Diagnostic Tool Plus Panasonic CF19 Laptop With V5.3.225 AG+ CF Software
John Deere Service Advisor EDL V3 Electronic Data Link Diagnostic Kit with V5.3.225 AG + CF Software
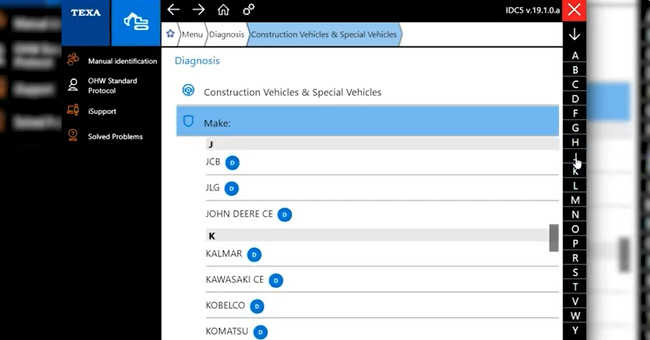
For now, we are just connecting using the TEXA Off-Highway Diagnostic Tool. This machine is Tier 4, so we will select Diesel Injection, click Start, and then Confirm. The system will take a moment to connect. Make sure the ignition is on.
While we are waiting, let’s take a quick look at the tool. Once connected, the Faults tab will show active codes in red and inactive codes in yellow.
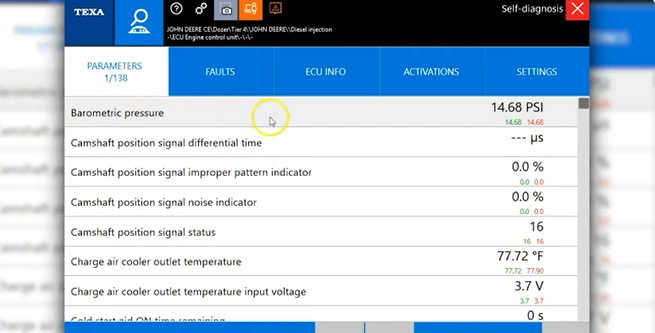
Switching to the Parameters tab, you will find 138 different real-time data points. Since the engine isn’t running right now, not much will change, but it gives you an idea of the data you can view – engine temperatures, pressures, fuel data, etc.
Next, we’ll go to the “ECU Information” tab.

This tab shows the engine details – this is a 4045 model, which means it’s a 4 cylinder, 4.5 liter engine.
Most importantly, we can confirm the diagnostic level of the ECM, which in this case is level 34.
Next, we’ll look at the “Activation” tab, where you can run tests like a DEF check, a NOx sensor test, etc.
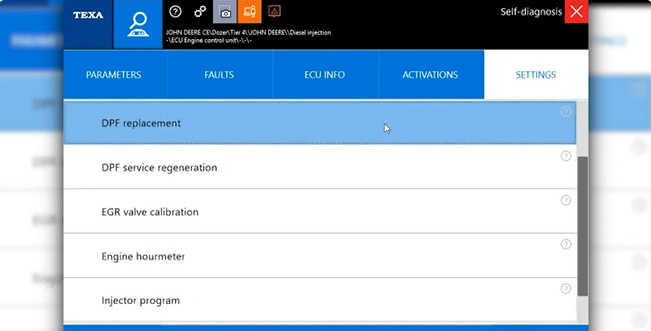
Now let’s look at the “Setup” tab – this is where you can clear locked codes, replace a DOC or DPF, initiate a regeneration, or even a code injector.
We’ll select “DPF Replacement”. Let’s assume the filter has been removed and cleaned by a professional, and now we want to reinstall it.
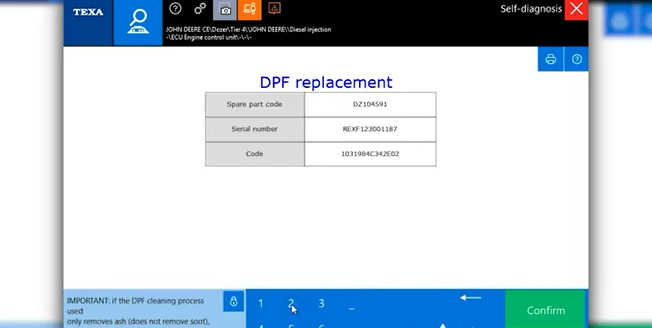
Click “Start” and a help box will appear explaining what information you’ll need, such as the spare part code and serial number.
That’s what makes this tool so powerful – you can code a new DPF, or you can tell the ECM that the existing DPF has been cleaned.
Once we make our selection, it will ask us to confirm. Normally, you would let it go through the entire calibration, but for the sake of this video, we’ll skip that step.
Let’s go back and start the engine so you can see how the parameters change in real time.
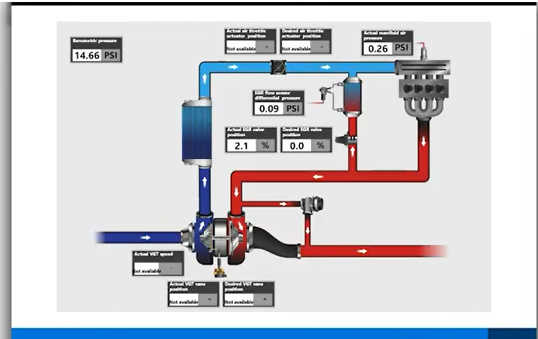
I also want to show you the *Dashboard* feature. Once we scroll to the top, you’ll see how it displays the data in a more intuitive, user-friendly format – perfect for technicians who may not be familiar with each parameter.
Next, let’s demonstrate how to force a regeneration.
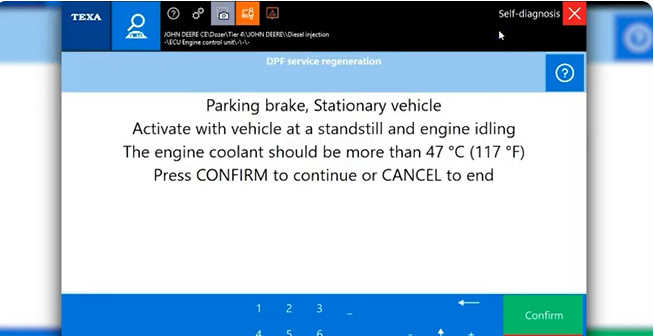
Go back to the *Settings* tab and find the *DPF Service Regeneration* command.
Click “Start” and you will get some warnings and information about how long the process will take.
We won’t run the entire process now – we’ll just start it and then cancel.
Click “Confirm” a few times to continue with the prompts.
You will see a visual indicator – the DPF turns red and the engine rpm starts to rise.
That’s it! A quick look at the power this tool provides to your John Deere system.