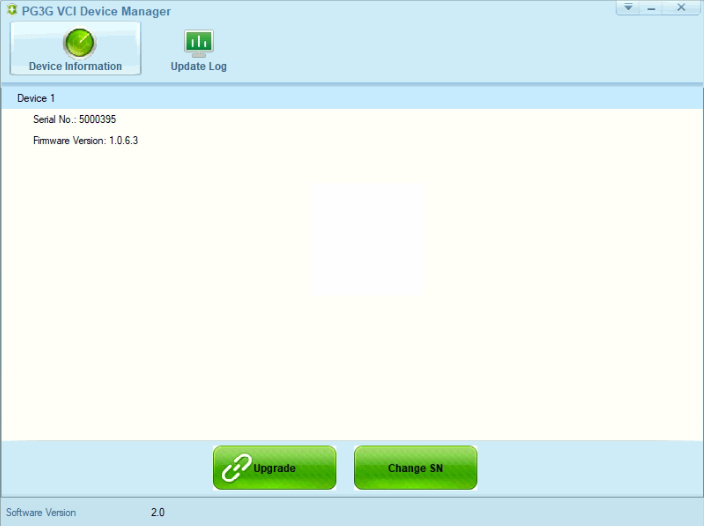
Step 1: Update to the Latest Version
- Install the Latest Software:
- Download and install the most recent version of the VNCI PT3G Device Manager.
- Update the VNCI PT3G firmware to the latest version.
- Current Version (as of 07/04/2024):
- VNCI Device Manager: v2.0
- Firmware Version: 1.0.6.3
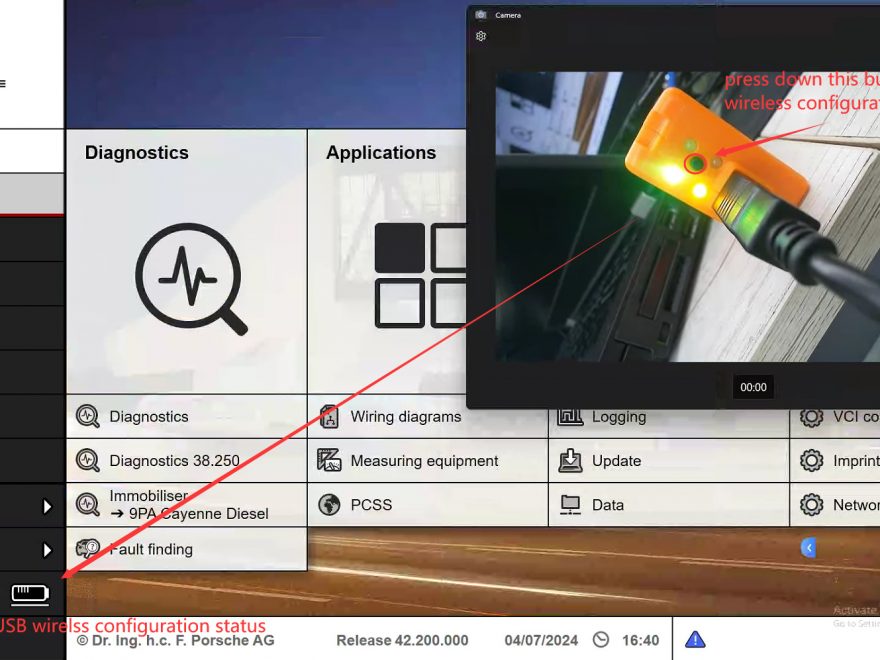
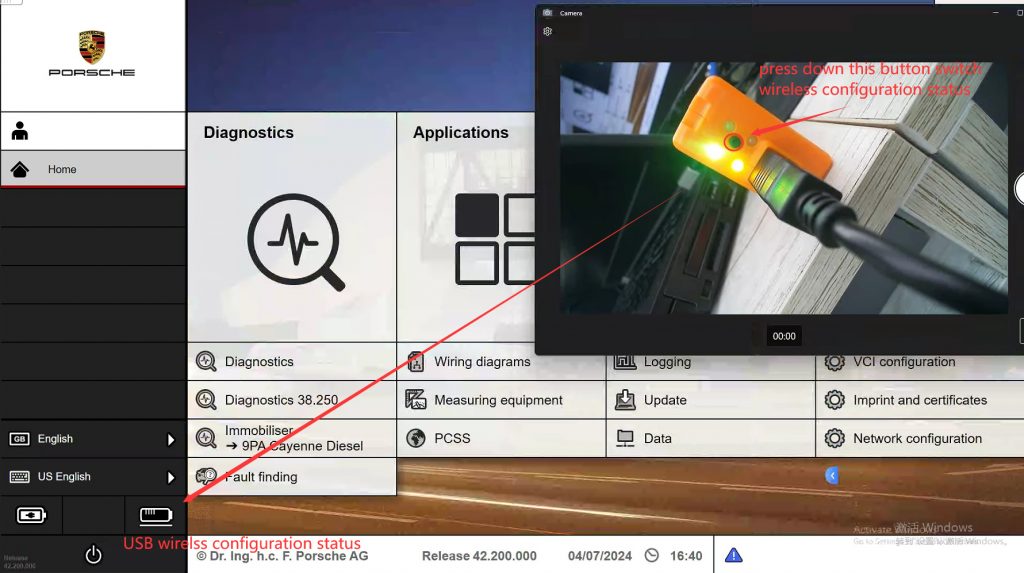
Step 2: Connect VNCI PT3G for Wireless Configuration
- USB Cable Connection:
- Connect the VNCI PT3G to the PIWIS3 software using a USB cable.
- Switch to the wireless configuration mode via the USB connection.
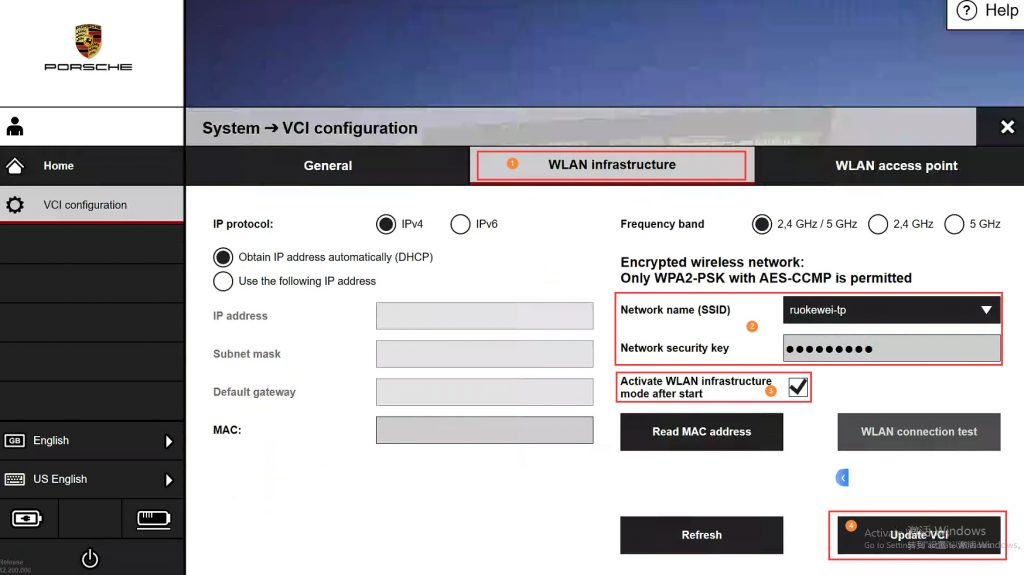
Step 3: Configure Network Information for WiFi and AP Connections
1. Configure WiFi Connection:
- WiFi Infrastructure Setup:
- Select the menu option “VCI Settings -> WiFi Infrastructure.”
- Enter your network name (SSID) and password.
- Ensure the checkbox is checked to enable the configuration.
- Click “Update VCI” to save the configuration settings.
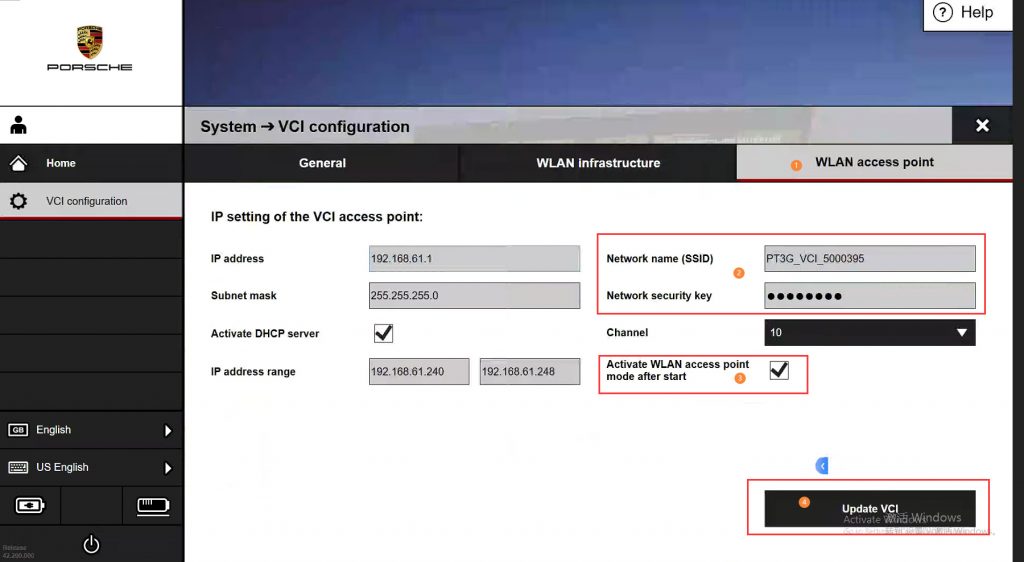
2. Configure AP (Access Point) Connection:
- AP Connection Setup:
- Select the menu option “VCI Settings -> Wireless Access Point.”
- Customize the wireless network name (default: “PTG_VCI_{Device Number}”) and set a password.
- Make sure to check the checkbox to activate the AP configuration.
- Click “Update VCI” to save the settings.
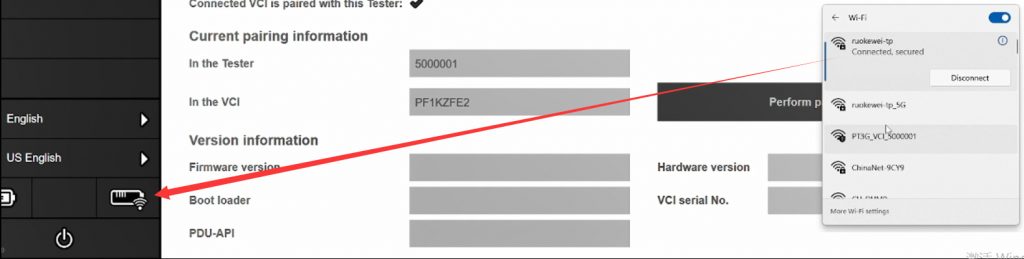
Step 4: Pair the PIWIS3 System with VNCI PT3G
- Pairing Process:
- After configuring the WiFi and AP connections, pair the VNCI PT3G with the PIWIS3 system on your current computer.
- Important: You must re-pair the VNCI PT3G every time you change the PIWIS3 computer.
- Pairing Steps:
- Select the “VCI Settings” menu -> “Wireless LAN Access Point.”
- Click the “Pair Now” button.
- If the pairing is successful, a “✔” will appear; if unsuccessful, an “×” will be displayed.

Step 5: Disconnect USB and Restart PIWIS3 Software
1. Wireless Connection via WiFi Infrastructure:
- Ensure Proper Network Connection:
- Confirm that the computer is connected to the same network as the VNCI PT3G.
- Connect the VNCI PT3G to the vehicle or an OBD16 power supply. Press and hold the VNCI PT3G button until the LED light status changes.

- Verify Connection:
- The VNCI PT3G will emit a deep sound when it connects to PIWIS3 via WiFi infrastructure, and the PIWIS3 software will display the wireless connection icon.
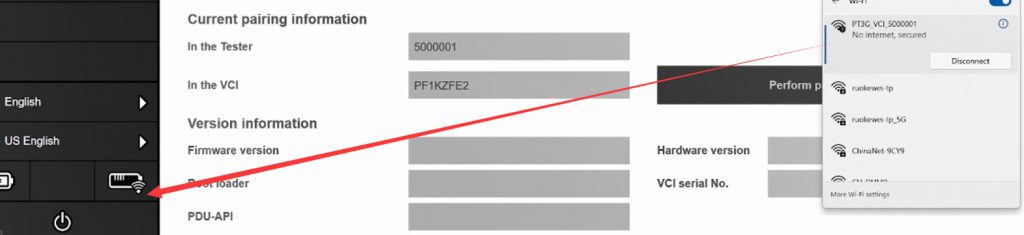
2. Wireless Connection via WiFi Access Point:
- AP Connection Setup:
- Connect the VNCI PT3G to the vehicle or an OBD16 power supply. Press and hold the VNCI PT3G button until the LED light status changes.

- Connect the VNCI PT3G to the vehicle or an OBD16 power supply. Press and hold the VNCI PT3G button until the LED light status changes.
- Enter AP Password:
- Enter the custom password for the AP connection. Once the device emits a long low beep, the PIWIS3 software will display the wireless connection icon.
Note:
- AP Connection Requires a Wireless Adapter:
- If your computer has only one wireless adapter, you won’t be able to access the Internet while using the AP connection mode.
- To connect to the Internet while using AP mode, you will need an external WiFi adapter.