How to configure a Wireless Profile on a MicroPOD2?
Preparation:
On a PC with the wiTECH V17 software application installed
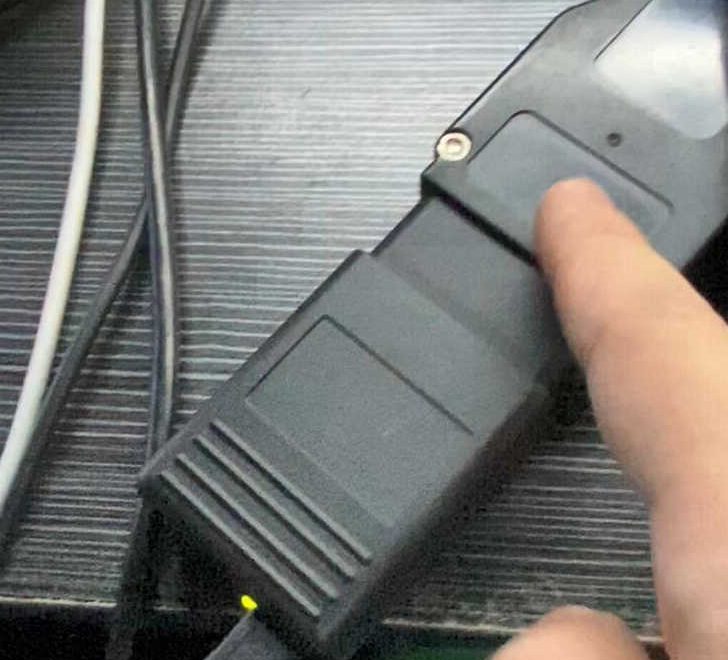
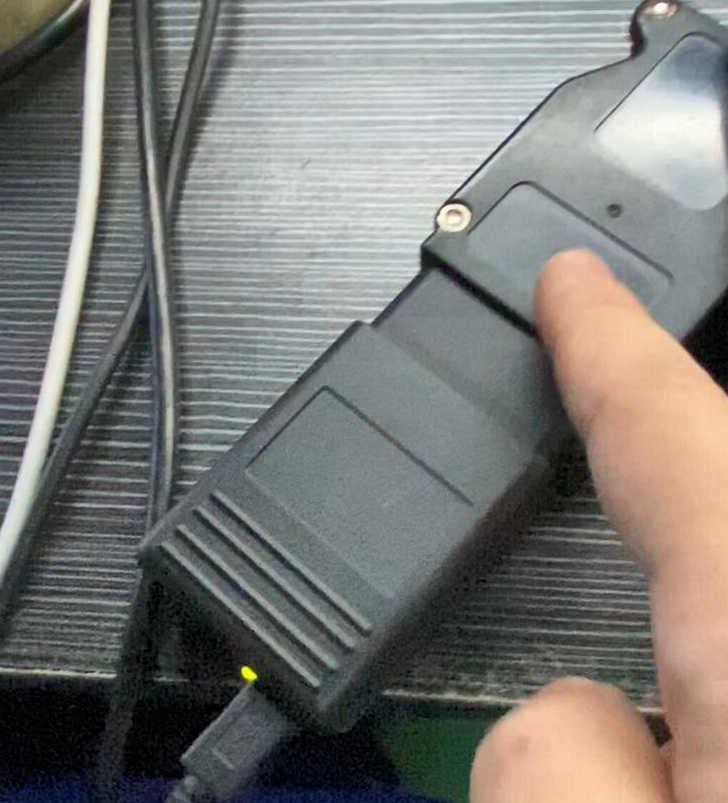
Then plug MicroPod II interface into the OBD2 port of your vehicle. The indicator will turn green, it means it car is charging the device.
Meanwhile use the USB cable to connect one laptop (Dell, Lenovo etc) with installed V17.04.27 wiTech software
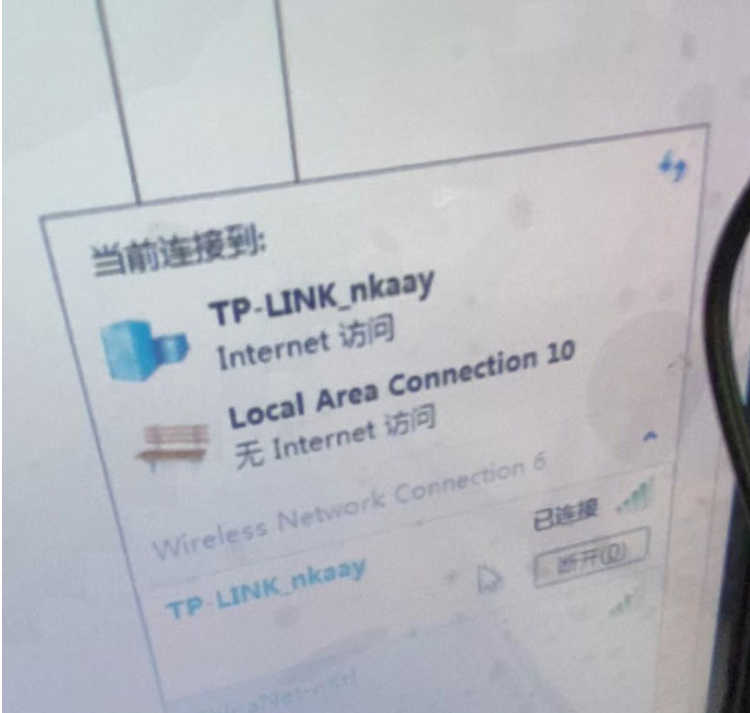
Connect wireless WIFI on the computer.
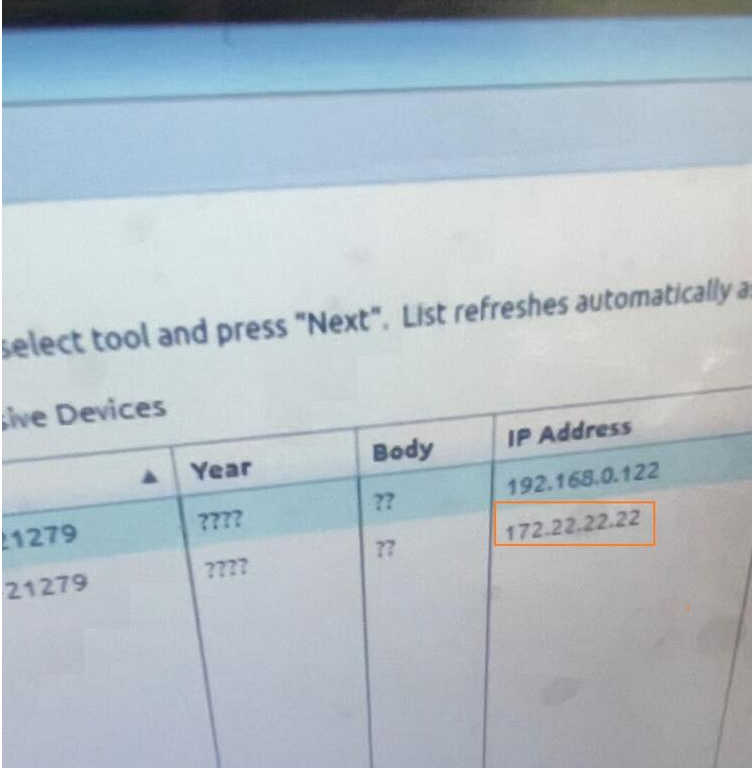
Enter IP “172.22.22.22” into the address bar of an Internet browser.
This opens the Witech setting interface
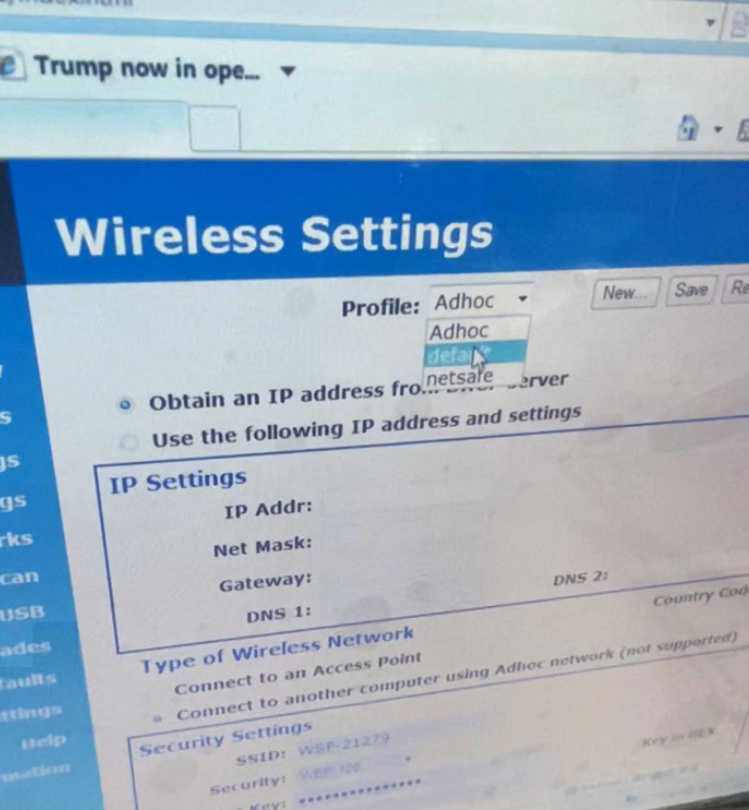
Select “Wireless Settings” in the menu on the left

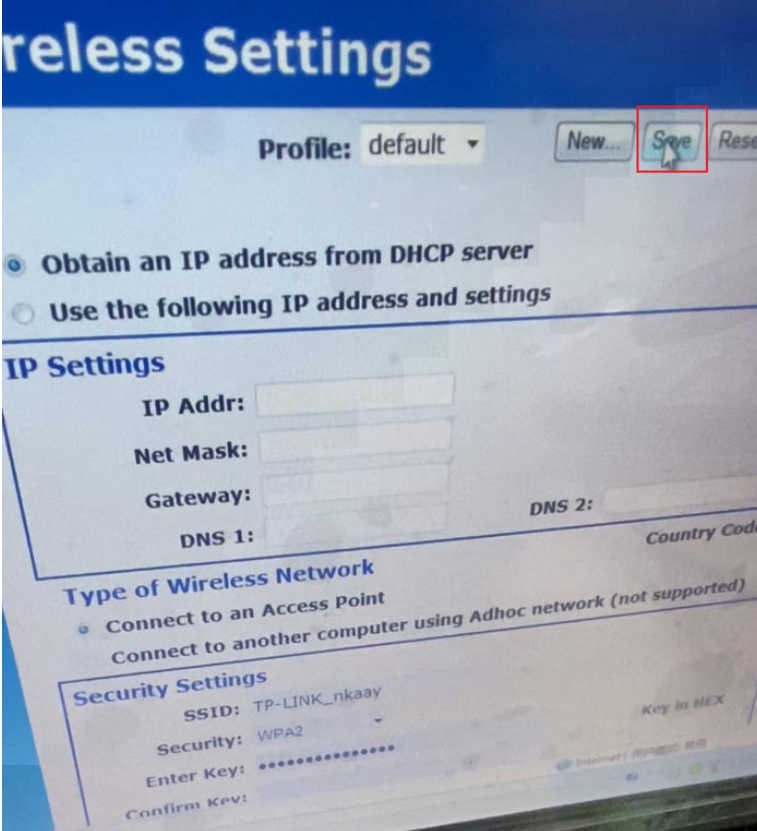
Profile is set to “Default”.
Click on “Save”.
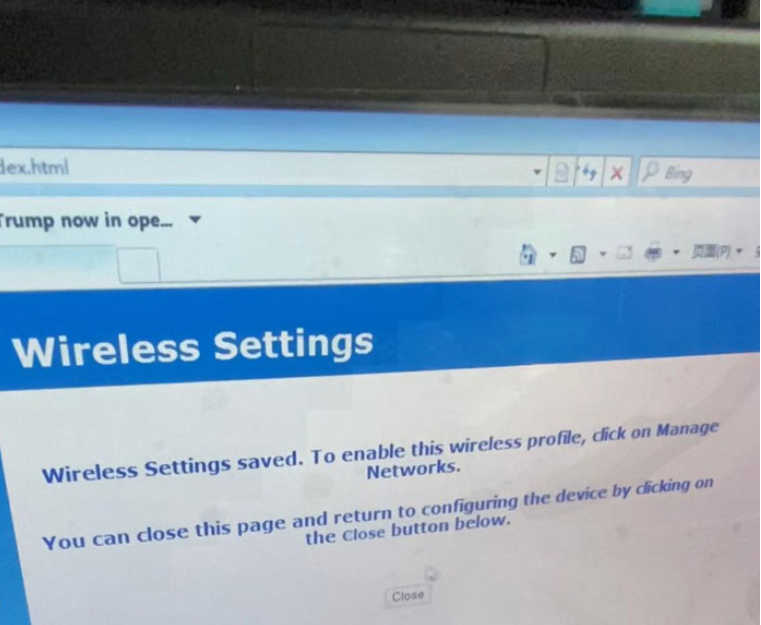
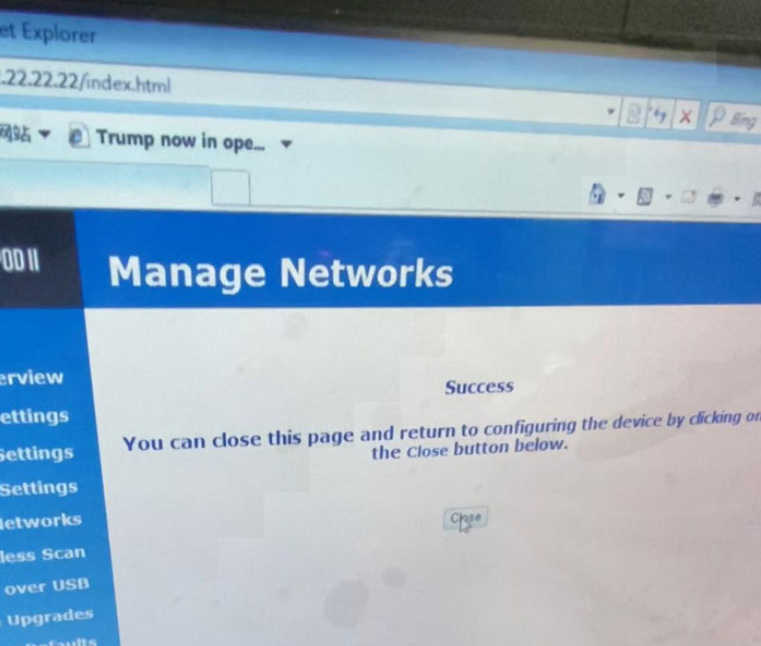
Wireless Settings saved. To enable this wireless profile, click on “Manage Networks”.
You can close this page and return to configuring the device by clicking on the close button below.
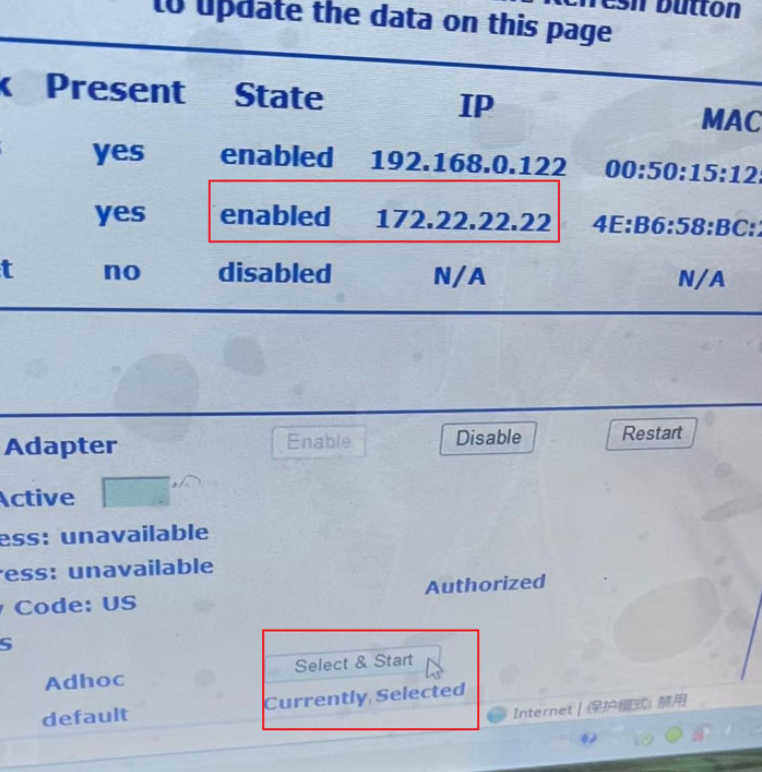
Next operation is to click on “Manage Networks” -> Wireless (tick it off) -> Select & Start.
Once the connection is complete you will see an IP address populate for the wireless interface
Success, close it.
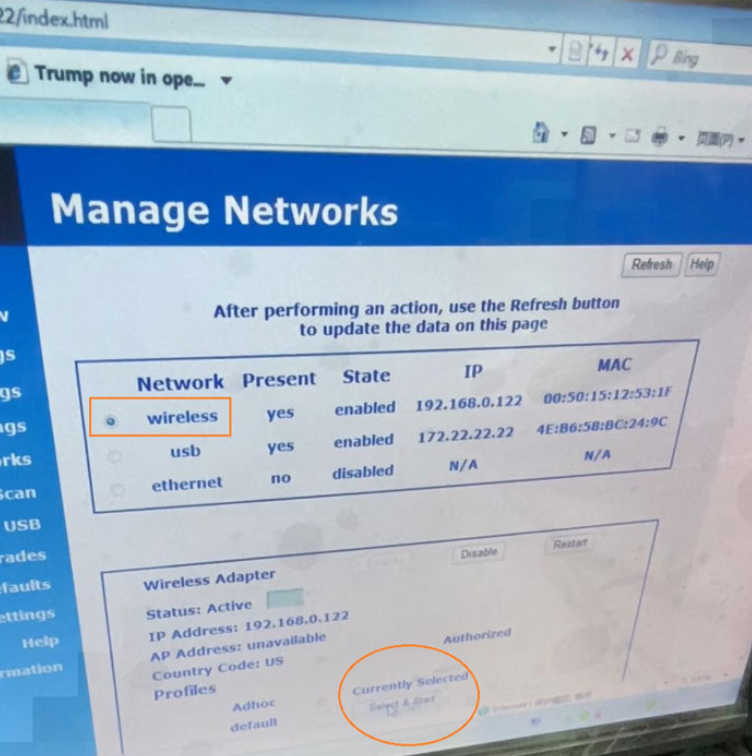
Back to click on “Manage Networks”, now we can see “Currently Selected”, and 172.22.22.22 is enabled, which means the wireless connection is set successfully.
V17.04.27 wiTech MicroPod2 Wifi setting is done successfully.