Vehicle History allows you to playback or view all the log files and reports located in the automatic log directory via the Connection History tab. The Inspection History tab allows you to view or edit PM Inspections. Data can also be sorted and grouped.
The Connection History tab also supports a Demo mode enabling you to explore application features quickly and easily without needing access to vehicles.
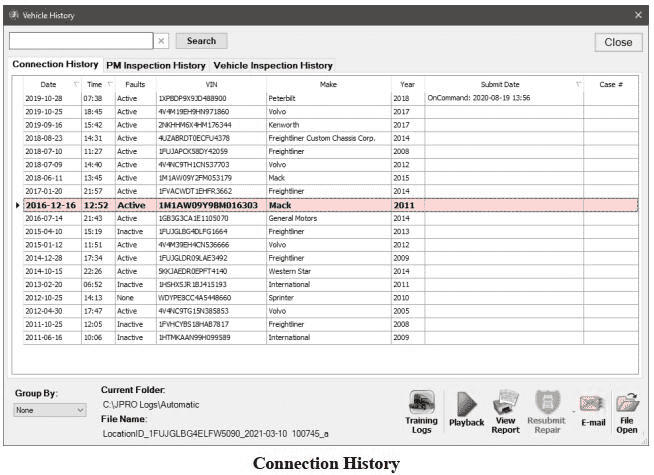
1.Select the Vehicle History button on the main toolbar.
2.The Vehicle History window appears with the Connection History tab selected and showing a listing of log files and reports located in the automatic log directory.
NOTE: Unit Number will only display if enabled in Preferences.
3.Use the Search at the top of the form to search all columns by Make, Unit Number, Customer Name, Comments or even a partial VIN. The displayed results will show only those items that meet all search criteria.
4.Use the Group By box to select which report heading to sort on.
5.Select the Training Logs button to view all installed training log files. This allows you to select files for playback to explore features without needing a vehicle connection.
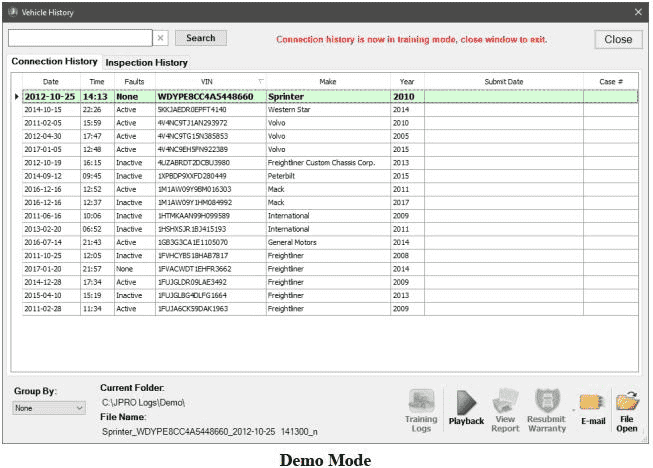
NOTE: Vehicle History will stay in training mode until you close the Vehicle History window.
6.Select the log file of interest from the Connection History tab.
a.Select the Play Log button or double-click on a row to play back the previously recorded data.
b.Select the View Report button to view the JPRO® Diagnostic Report if one is available.
c.Select the Resubmit Repair – Decisiv button to re-upload the selected file to Decisiv (ASIST, PACCAR Solutions, ISUZU Connect, or HINO INSIGHT). This button is only enabled if the vehicle information was previously submitted to Decisiv.
d.Select the Resubmit Repair – OnCommand button to re-upload the selected file to OnCommand™.
This button is only enabled if the vehicle information was previously submitted to OnCommand.
NOTE: To submit vehicle data not previously submitted to Decisiv, OnCommand™, or Trimble; you must playback the log file to the end and select the appropriate Submit Repair selection from the main toolbar.
e.Select the Email button to attach and e-mail the playback file, JPRO heavy duty trucks Diagnostics Report and Vehicle Inspection information if available. See Submit By E-mail for details.
f.Select the File Open button to playback a log file not in the automatic log file directory. The standard Windows Open File dialog appears and enables you to browse to the log file and select Open.
7.Select the PM Inspection History tab to view a listing of all saved PM Inspections located in the Inspection directory.
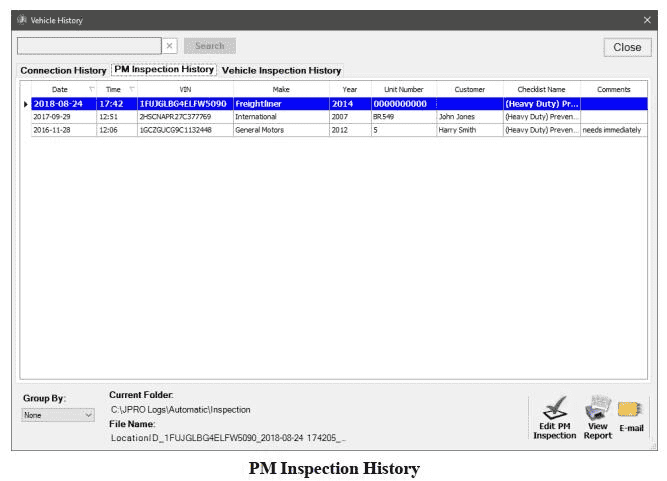
8.Select the inspection file of interest from the PM Inspection History tab.
a.Select the Edit PM Inspection button to edit the Inspection information for the given vehicle.
b.Select the View Report button to view the JPRO® PM Inspection Report if one is available.
c.Select the Email button to attach and e-mail the PM Inspection Report and Inspection XML file.
9.Select the Vehicle Inspection History tab to view a listing of all saved Vehicle Inspections located in the Vehicle Inspection directory.
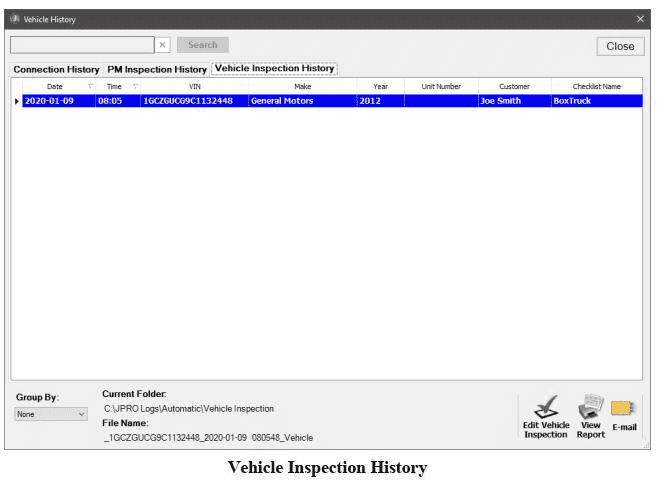
10.Select the inspection file of interest in the Vehicle Inspection History tab.
a.Select the Edit Vehicle Inspection button to view and possibly edit the Vehicle Inspection information for the given vehicle in the Vehicle Inspection form.
NOTE: Only unsigned Vehicle Inspections may be changed or edited. Signed Vehicle Inspections can only be viewed.
b.Select the View Report button to view the JPRO® Vehicle Inspection Report if one is available.
c.Select the Email button to attach and e-mail the Vehicle Inspection Report and Inspection XML file.