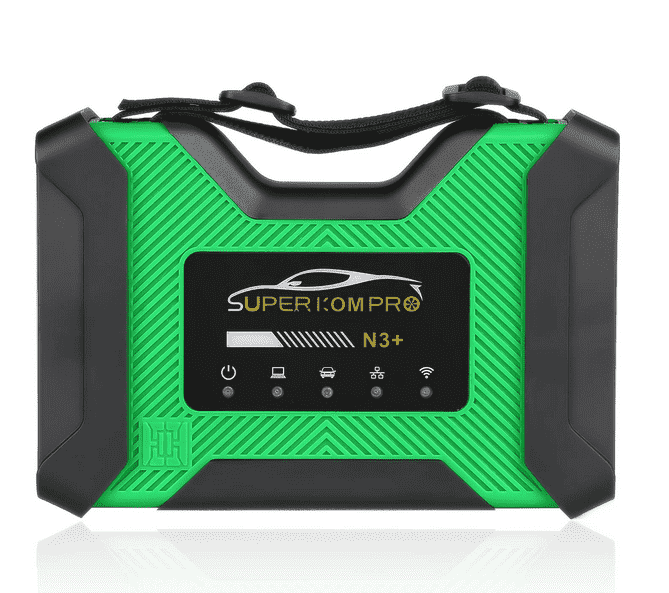
Super ICOM Pro N3+ is a comprehensive diagnostic scanner which has a one-key switch button to freely switch between ICOM software and J2534/ DoIP software, and can work with special test software to test BMW, Mercedes, Volkswagen, Honda, Land Rover, Toyota, etc. It supports both wired connection via USB cable and wireless connection, and adapts the original ICOM solution which allows firmware update online from ICOM server.
To use Super ICOM Pro N3+ BMW diagnostic tool, it needs to connect with wired or wireless network.
1.Connect N3+ with wired network (USB connection)
Plug power supply to N3+ or connect with vehicle via OBD cable, and connect the USB cable of N3+.
Open computer, connect it with the USB cable
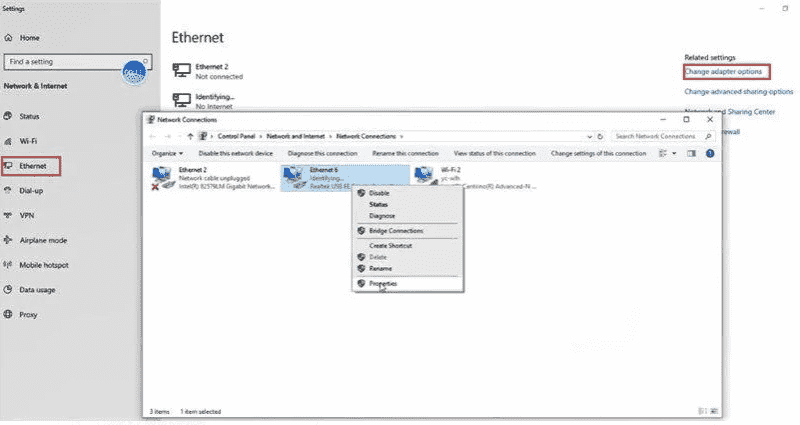
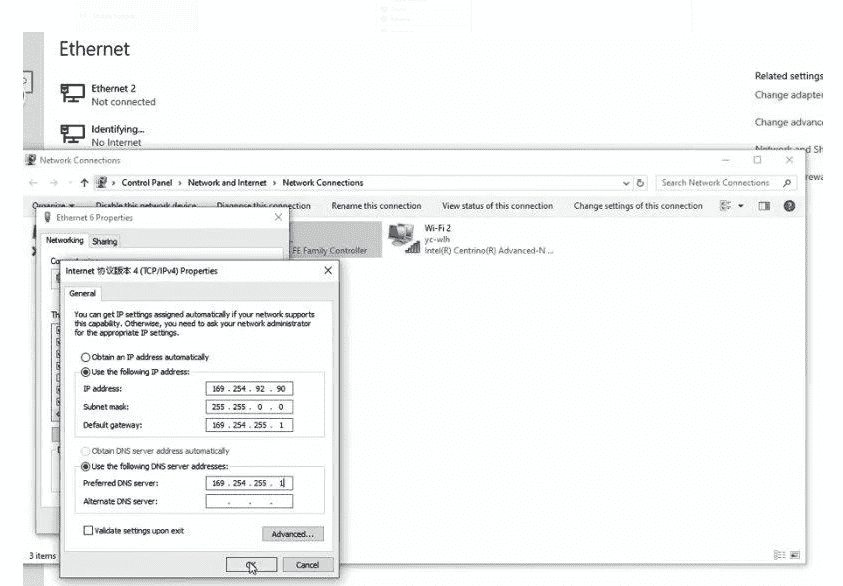
Open computer configuration interface, go to settings>> Ethernet>> Change adapter options >>
Realtek USB FE Family Controller network
Right click it and select Properties>> Networking>>TCP/IPV4
Set the IP address and DNS server addresses as below.
IP address: 169.254.92.90
Subnet mask: 255.255.0.0S
Default gateway: 169.254.255.1
Preferred DNS server: 169.254.255.1
After setting, click OK, and the wired network configuration is completed.
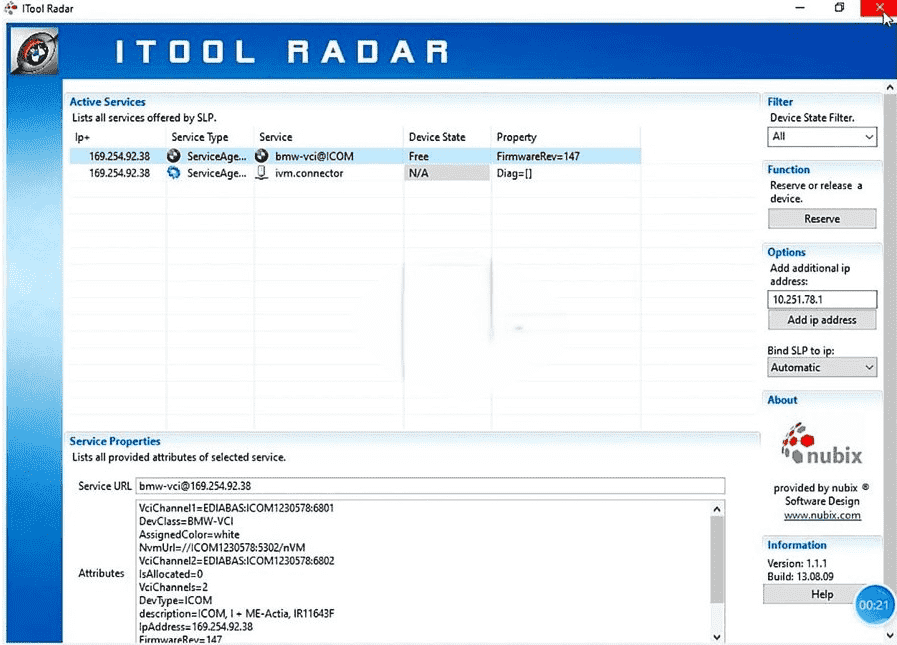
Open ITool Radar software, and select the corresponding option to release. Then you can use the special inspection software to test normally.
Open ITool Radar software, and select the corresponding option to release. Then you can use the special inspection software to test normally.
Kindly notice:
If you want to replace a new Super ICOM Pro N3+ BMW diagnostic tool on the same computer, you need to reset the IP address. After the setting is completed, the computer will be bound to N3+, and the network icon will disappear after you unplug the USB cable. After using the N3+ with wired and wireless Internet access, you do not need to set the IP address again.
2.Connect N3+ via WiFi
When you use wireless detection, you need to unplug the USB cable at the end of the computer, and then you will find that the SSID is N3+ ICOM-****.
Connect it directly, and input the password 123456789.
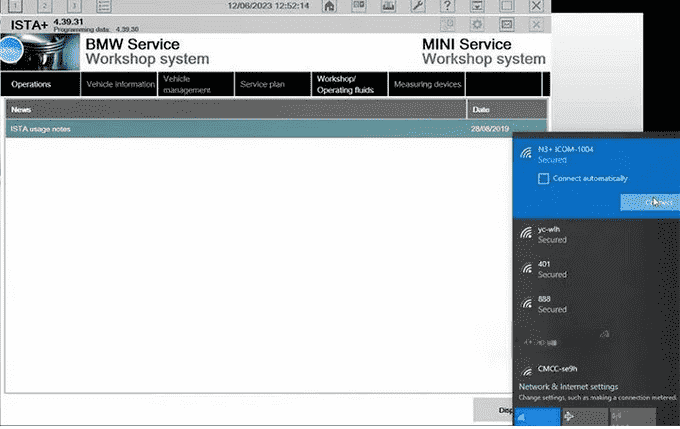
No equipment is required. You can directly use BMW special inspection software.
Fox example, open ISTA+ software, select Vehicle management, and select the related ICOM ID to set up connection. Then the software is ready to use.
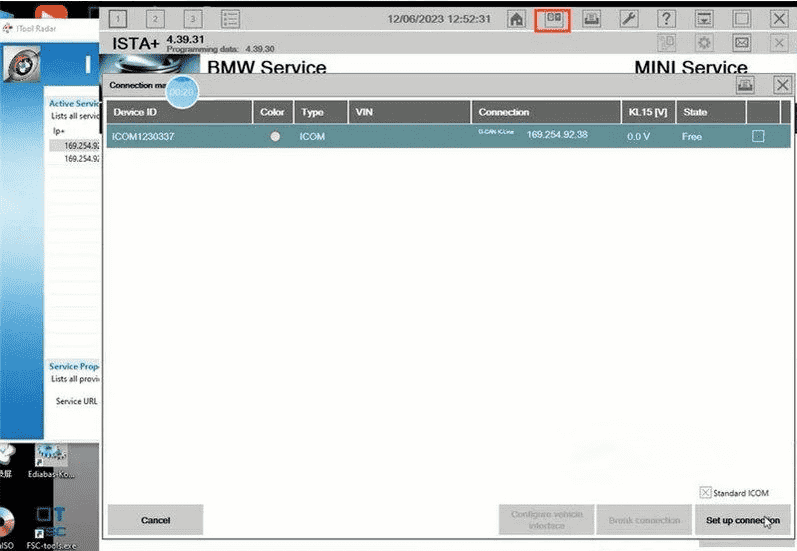
How to update Super ICOM Pro N3+ firmware?
First, check the current firmware version and download the newest version. Then follow the ICOM Update instruction to update N3+ firmware below.
Step 1.
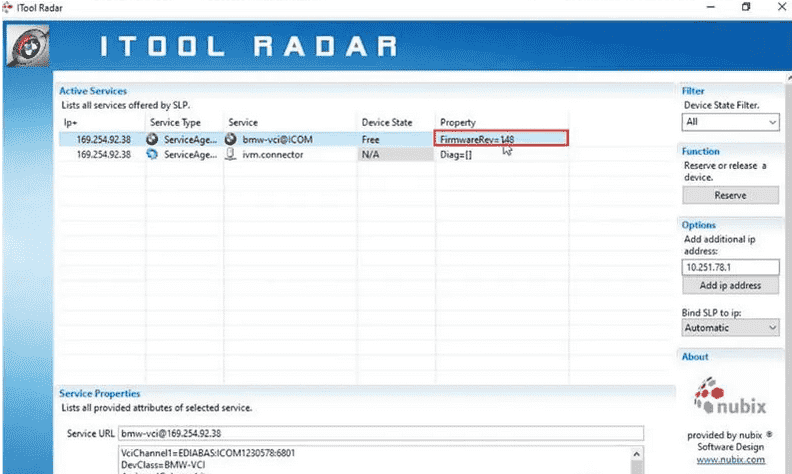
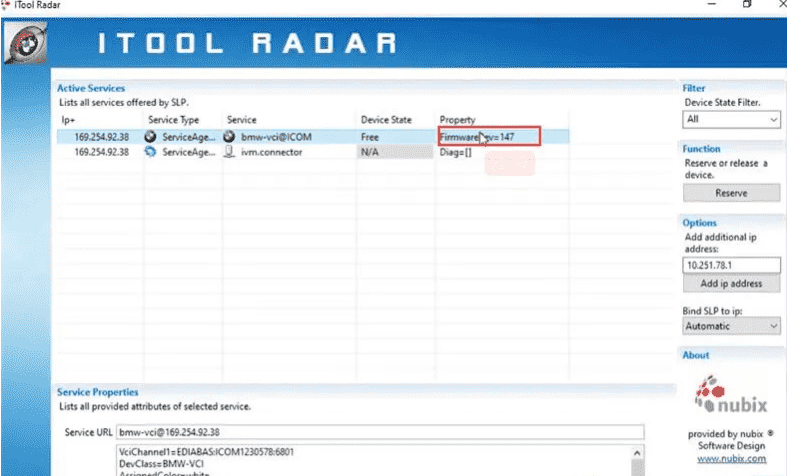
Open ITool Radar tool on desktop and check the current ICOM firmware version (i.e.V147)
Step 2.
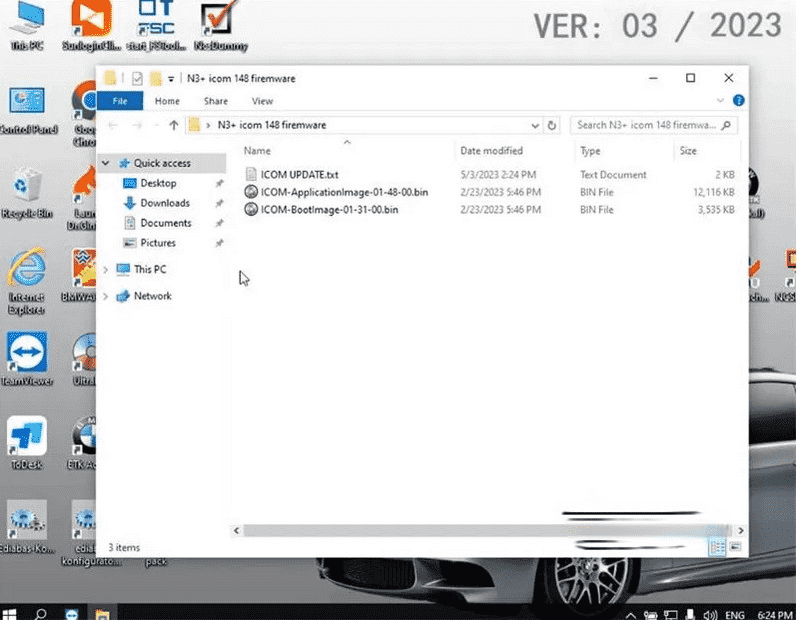
We’ll take N3+ ICOM V148 as a demonstration. The upgrade guide also applies to V149.
Step 3.
Make sure the Super ICOM Pro N3+ diagnostic scanner is connection to the computer with a USB cable and power on the ICOM with a 12V power adapter.
Step 4.
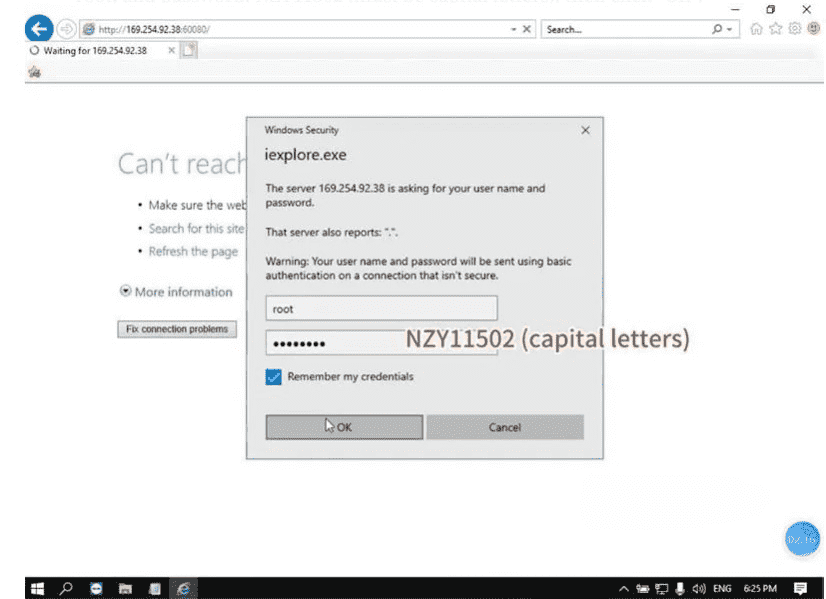
Access to http://169.254.92.38:60080/ with IE browser, input the user name: root, and password: NZY11502 (must be capital letters), then click “OK”.
Step 5.
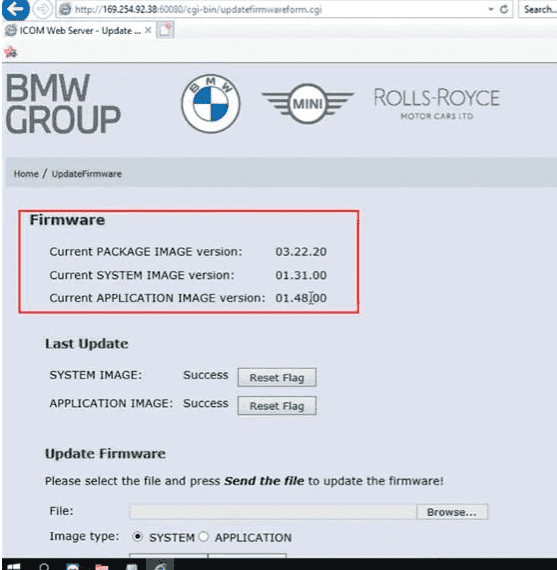
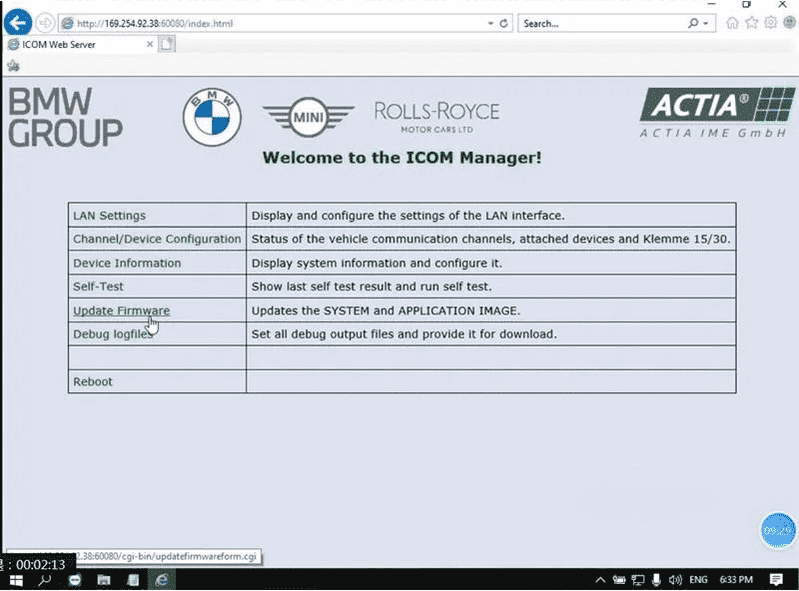
Click “Update Firmware” and you will see the version information of ICOM firmware.
Step 6.
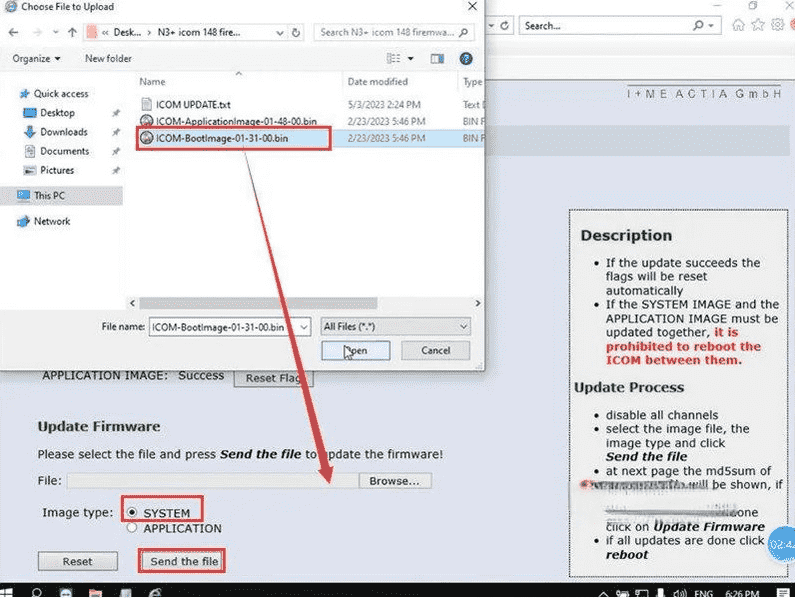
Select ICOM-BootImage-01–31–00 Bin file, set the image type to system, and click “Send the file”.
Step 7.
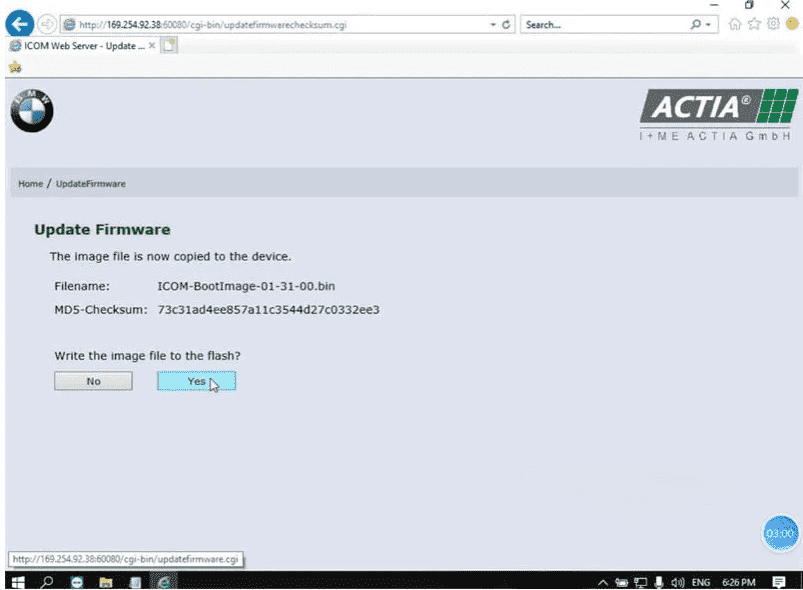
When it says “Write the image file to the flash?”, click “Yes” and the ICOM light will turn red.
Step 8.
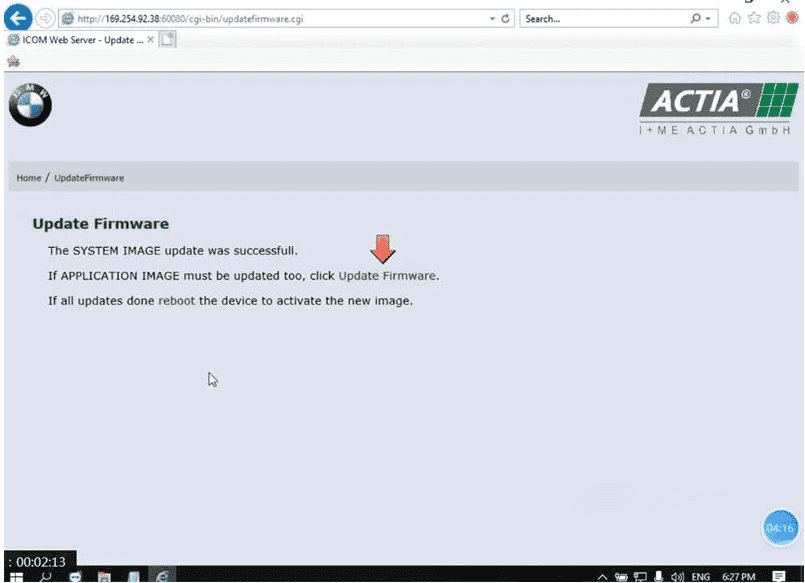
When it prompts “The SYSTEM IMAGE update was successful”, click “Update Firmware”.
Step 9.
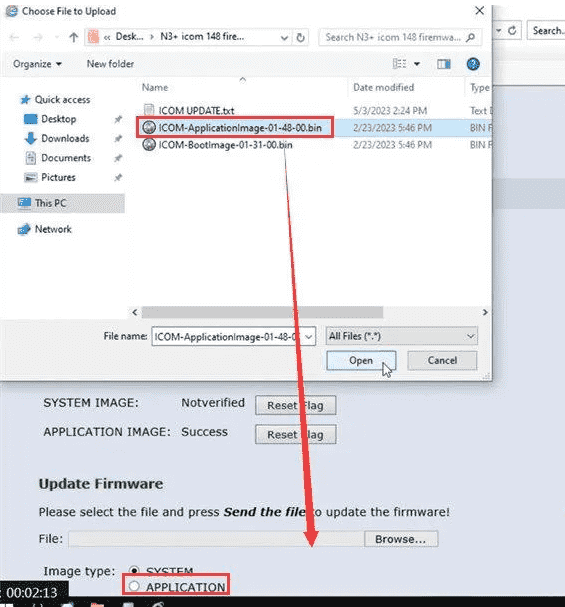
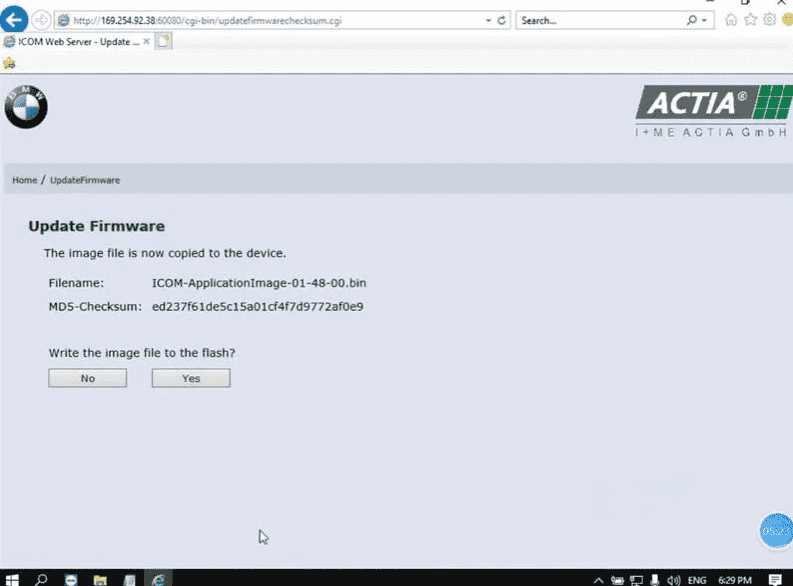
Select ICOM-ApplicationImage-01–48–00 Bin, set the image type to application, and click “Send the file”. The file will take a few minutes.
Step 10.
When it says “Write the image file to the flash?”, click “Yes” and the light of ICOM will turn red for the second time.
Step 11.
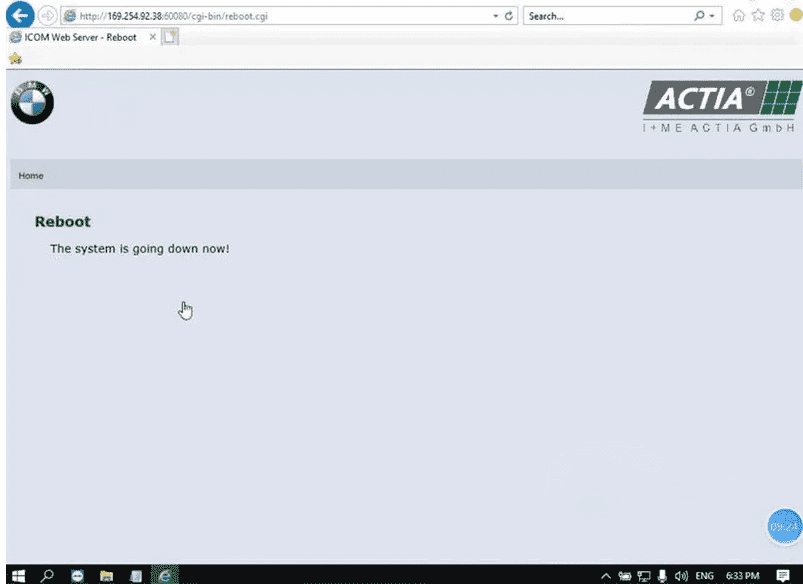
When it is all right, click “reboot”, and the system is going down now.
Step 12.
After the N3+ firmware upgrade is completed, check the current version again, the firmware version on ICOM Web server and ITOOL Radar is V148 now.
